Introduction
OpenBSD has a reputation for being difficult to get into. In practice, the installer is pretty straightforward; it's just different enough from Linux that it helps to know what's coming. This post walks through the full installation process, flags the decisions worth thinking about, and covers what to do once you're actually booted in.
Getting the Image
Download the latest release from openbsd.org. For most modern hardware, you want the amd64 build.
install79.imgfor USB drivesinstall79.isofor a VM or CD/DVD
Before you do anything else, verify the download. On OpenBSD:
$ signify -C -p /etc/signify/openbsd-79-base.pub -x SHA256.sig install79.imgOn Linux, signify isn't available. Use sha256sum against the provided checksum file instead:
sha256sum -c --ignore-missing SHA256Either way, don't skip this step.
Writing the Image
# Linux or macOSdd if=install79.img of=/dev/sdX bs=1M status=progress && sync
# OpenBSDdd if=install79.img of=/dev/rsd1c bs=1m
Double-check your target device! dd isn't referred to as disk-destroyer for no reason.
Installing the System
OpenBSD uses a text-based installer; no GUI, no wizard, just prompts. It covers keyboard layout, hostname, network configuration, root password, whether to start sshd on boot, X11, a non-root user account, and timezone. Nothing surprising, and it moves fast.
When the system is finished booting the installer will look like this.
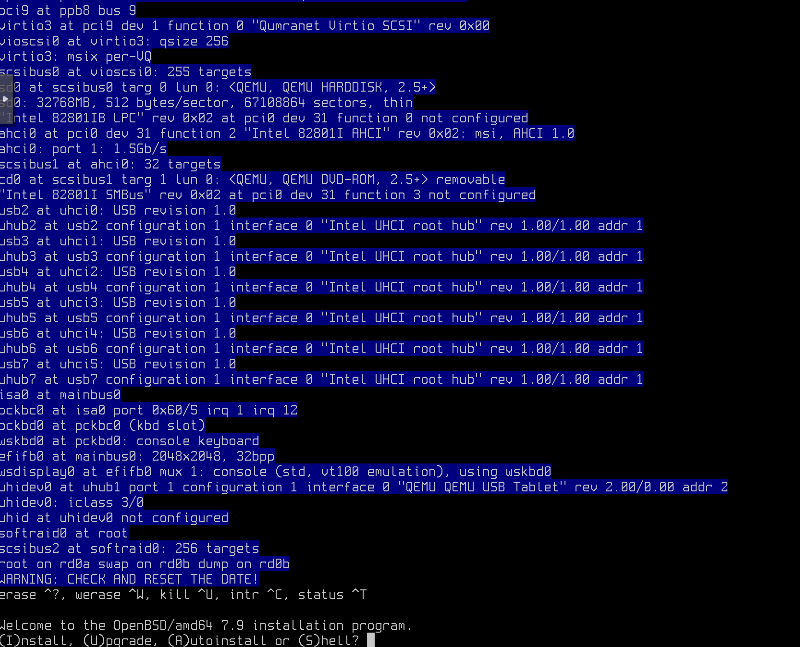
Press I and hit enter to begin the installation procedure.
Keyboard Layout
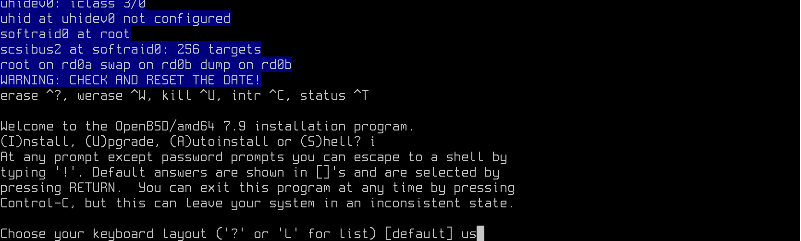
The installer will first ask you what your keyboard layout is. I chose US for mine.
Initial System Configuration
Next, the system will ask you for a hostname. It can be anything you want.
You will also be asked what network interface to configure for the host. Since I'm doing this in a VM, I chose vio0. After that you will be asked to provide an IP address for the interface, or allow the system to autoconfigure itself using DHCP for IPv4, and SLAAC / DHCPv6 for IPv6.
autoconf is typically fine unless you need to set up a static IP
Pressing enter without entering anything will use the defaults OpenBSD thinks are sensible. Noted by the square brackets [ ].
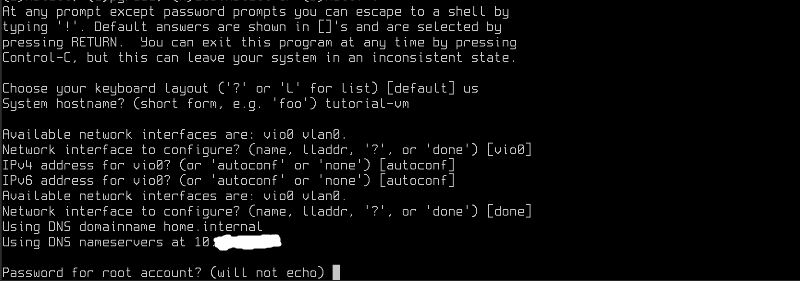
After network configuration you will be prompted to set, and confirm the root account password. Note that it will not echo.
You will be asked if you wish to start sshd on startup. I recommend to enable this as the default suggests.
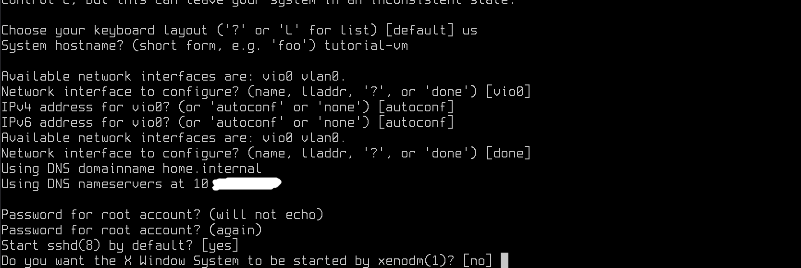
You will also be asked if you want the X windowing system to be started at startup. I typically choose not to here as I mainly use OpenBSD for routers. Maybe in a future post I will show how to set up OpenBSD on a laptop with full disk encryption (FDE) and XFCE.
Fun fact: OpenBSD actively maintains a security-hardened version of X11. It's called Xenocara.
The next prompt will now ask you to set up your unprivileged user, set the password for that user, and if you want root SSH login enabled (please don't).
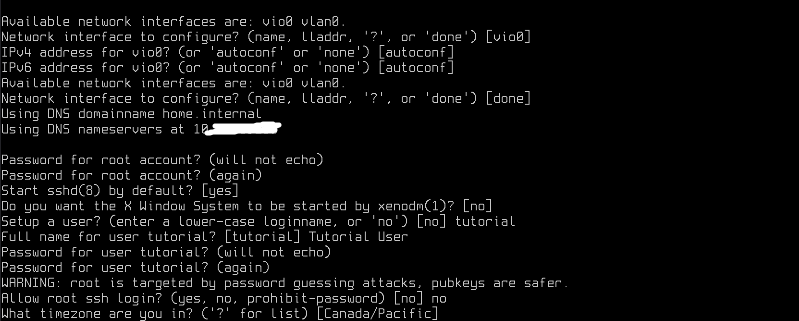
Finally, you will be asked to set the system timezone. I chose my timezone (PDT).
Disk Layout
Now we will partition the disks! The nice thing is OpenBSD holds your hand pretty much throughout the entire installation process. The auto-layout is sensible. Accept it unless you have a specific reason not to.
WARNING: OpenBSD relies on specific partition layouts for security! If you don't know what you're doing. Use the defaults.
This is the part worth paying attention to. OpenBSD uses its own 'disklabel' partitioning system and applies security mount flags: nodev, noexec, and nosuid automatically where appropriate. You'd have to go out of your way to replicate this on Linux.
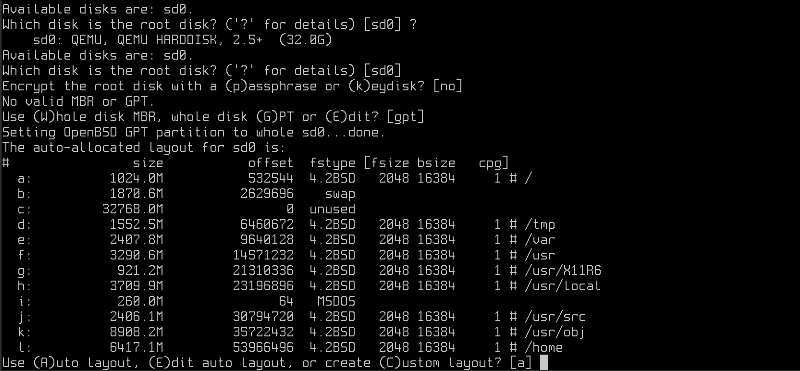
You will see a list of disks. If you don't know which disk you want to install OpenBSD to, the installer helps you. If you enter ? it will give you high-level details of the disks on your system.
Select the disk you wish to install to by entering it's device name or accepting the default.
You will be asked if you wish to encrypt your disk with a passphrase or a keydisk. I will not be doing this as that is out of scope for this tutorial.
Installing the File Sets
OpenBSD installs in modular sets. First, choose the location for the sets, http, nfs, or the disk the sets are located on. For this tutorial I will use 'http' to pull up-to-date file sets from OpenBSD.org directly. It will ask you for a proxy if you need one. I do not so I leave it blank.
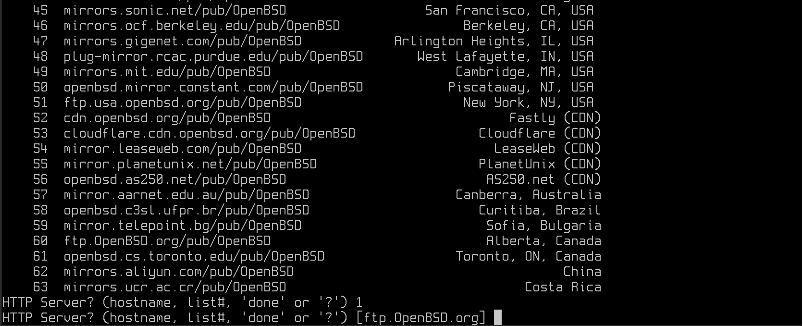
You will then be asked to select a server to pull the sets from. I choose '1' to pull them down from ftp.openbsd.org. You may use a faster mirror closer to you.
Leave the server directory default.
Next, choose what you actually need:
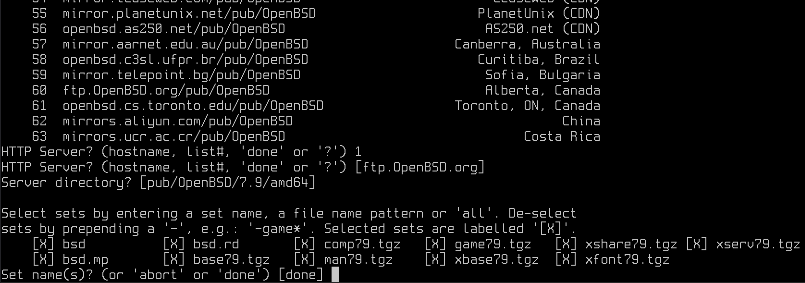
For the purpose of this guide, I will install all the sets.
New users are recommended to install all the sets.
For high-security use cases like a router, skip 'x*', 'comp', and 'game'. Anything you don't install can't be exploited.
The installer will download and verify sets automatically, or install from the USB if you have them locally.
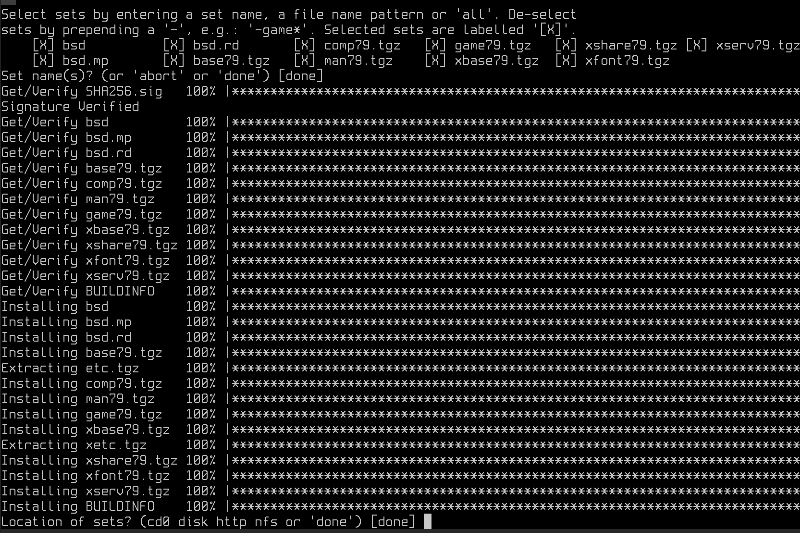
The file sets are now installed. Press enter to continue onward.
The system will now check if you're using a multiprocessor machine and select the appropriate kernel. It will also do an automatic firmware update. It will then relink the kernel for enhanced security.
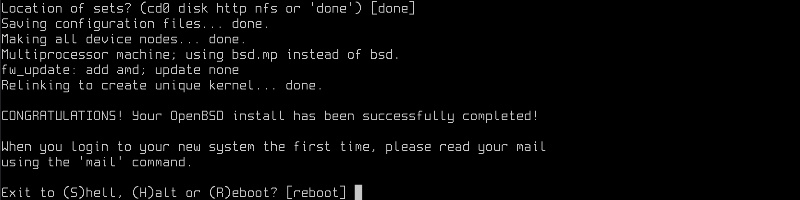
Congratulations! You just installed OpenBSD. Reboot to boot into the freshly installed system.
First Boot
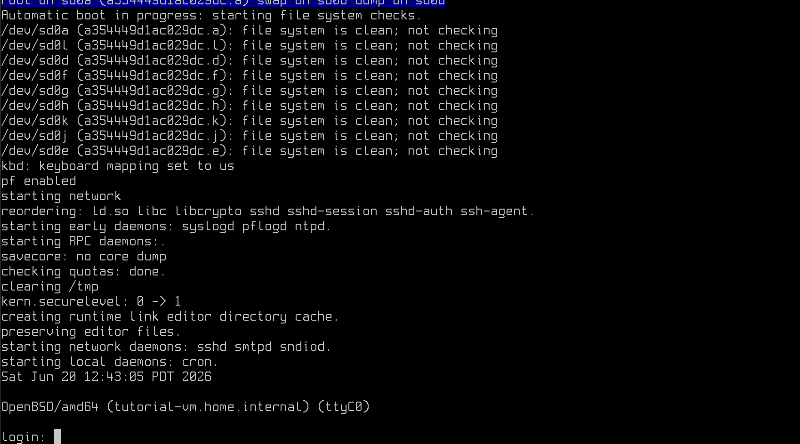
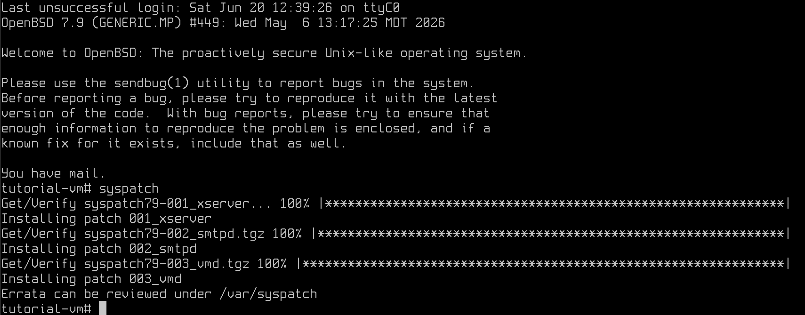
You're in. Log in using the credentials you set up during install. Once logged in, run this as root before anything else:
# syspatch
This command installs patches for system binaries. It is recommened to run this every once in a while. (I tend to have cron automate this for me once a week.)
What's Different from Linux
A few things will catch you off guard if you're coming from Linux; worth knowing upfront rather than discovering mid-setup.
No sudo. OpenBSD ships with doas instead. It's simpler, easier to audit, and has a massively reduced attack surface comparatively. The unprivileged user we set up during install is part of the wheel group by default. To use doas, configure it once:
# echo "permit persist :wheel" > /etc/doas.confBasic Package management
pkg_add, pkg_delete, pkg_info for straightforward and fast package management:
# pkg_add -u # update everything
# pkg_add vim curl
Basic Service Management
No systemd. OpenBSD uses initscripts; services live in /etc/rc.d/ and are managed with rcctl.
# rcctl enable httpd
# rcctl start httpd
Refer to the man pages for help if you need it. OpenBSD is extensively documented, and the answer will usually be there.
PF Firewall
Configuration lives in /etc/pf.conf. It's worth taking the time to learn; the syntax is readable and intuitive in a way that iptables never managed to be. It starts blocking everything by default, which is exactly what you want.
Post-installation
# Privilege escalation
echo "permit persist :wheel" > /etc/doas.conf

# Patches first
syspatch

# Update and install packages
pkg_add -u
pkg_add vim curl wget git

# Firewall
vi /etc/pf.conf
pfctl -f /etc/pf.conf
pfctl -e
Wrapping Up
Is this more involved than spinning up an Ubuntu server? Yes. But OpenBSD forces you to understand what you're actually running; the partition layout, the mount flags, the firewall defaults. None of it is arbitrary. Every decision has a reason behind it, and by the time you're done, you know what that reason is.
The OpenBSD FAQ is one of the best pieces of technical documentation I've come across. If you hit a wall, start there.