Introduction
Proxmox VE is the backbone of my homelab. It's what runs my VMs, my LXC containers, and frankly most of my life at this point. It's a fantastic platform; but like any powerful tool, it rewards the people who take the time to configure it properly and punishes those who don't. This post covers the practices I've settled on after plenty of trial and error; the things I wish someone had told me before I learned them the hard way.
Enable the No-Subscription Repo
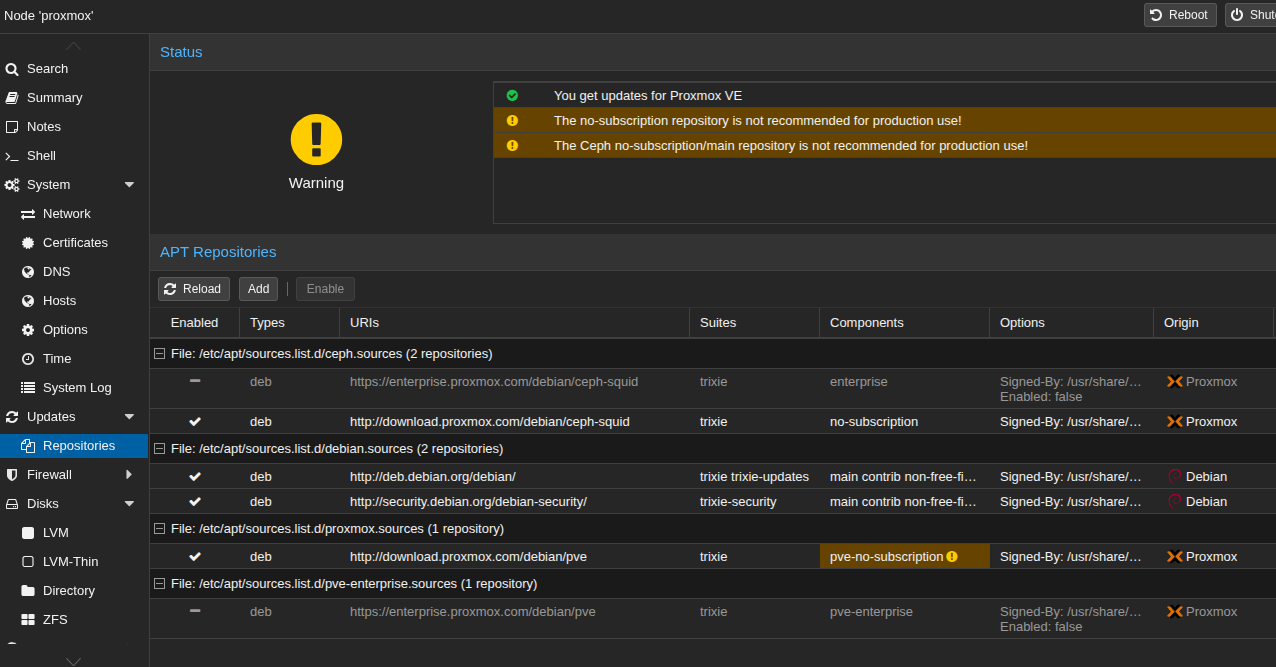
Fresh Proxmox installs default to the enterprise repository, which requires a subscription. If you're running a homelab, you almost certainly don't have one. The result is a broken apt source that throws errors on every update. This also results in us not getting crucial security updates. We can't have that, can we?
Switch to the no-subscription repository, but understand the tradeoff, updates here are less tested than the enterprise tier. For a homelab, it's fine. For production, I would absolutely budget for a subscription.
Reboot Proxmox.
Separate Your Storage
Don't run VMs off the same disk as the Proxmox OS. Your system drive should run the hypervisor; your VM storage should live elsewhere. This not only improves performance, it improves fault tolerance and makes recovery a little smoother if something unexpected were to happen. A failing VM disk shouldn't take your hypervisor with it.
For most homelab setups, a dedicated SSD for VM storage added as a directory or LVM thin pool is more than enough. Here is my current storage setup. Very simple :)
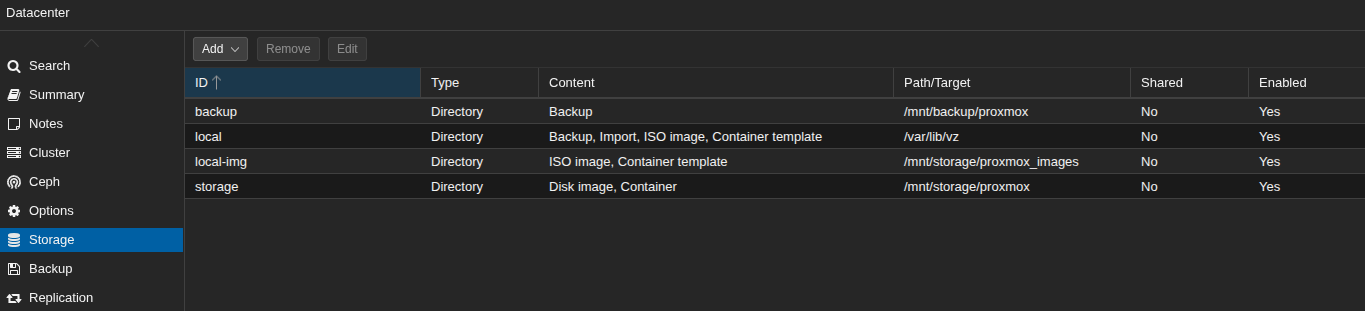
One of the first things I do on a fresh install is I remove the local-lvm volume. Don't worry this won't break things. It just allows us to reclaim that storage for the host. To do this we do a few simple steps:
1. Using the Proxmox GUI, go to the node, click storage, and select local-lvm. Use the 'Remove' button to remove the volume.
2. Next, click on the node, click shell. Once in the shell, enter this command. This resizes the 'root' LVM volume.
# lvresize -l +100%FREE /dev/pve/root
3. After that, we want to shrink it slightly since the host is on ext4, and we need some unprovisioned space so e2scrub works.
Don't forget this step as it's a pain to fix if skipped. Trust me. I know.Run the following command.
# lvreduce -L -256M /dev/pve/root4. Finally, resize the filesystem.
# resize2fs /dev/mapper/pve-root5. Reboot Proxmox.
Save Your SSD!
As you probably know, at the time of writing this, storage space is getting very expensive. Especially SSDs. Since Proxmox is not designed for consumer-grade SSDs, and is very write-heavy - the next step we will take is disabling some services since we are most likely not clustering in a homelab environment, and we are running a single-node server only. Disabling these services will help preserve our SSD's precious write cycles. Skip this step if you plan on clustering as it will break that functionality until the services are re-enabled.
Run the following commands:# systemctl stop pve-ha-crm && systemctl disable pve-ha-crm# systemctl stop pve-ha-lrm && systemctl disable pve-ha-lrm
pve-ha-crm.service, manages resources for the entire cluster, monitors the status of each node, and other high-availabilty features we do not need. pve-ha-lrm.service is responsible for resource allocation on the local PVE node.
Use LXC Containers Where You Can
Not everything needs a full VM. For lightweight services: DNS resolvers, reverse proxies, monitoring agents, etc. LXC containers are faster to spin up, lighter on resources, and easier to manage. Most of my stack runs in Debian LXC containers. The exception is software that either doesn't play nicely in a container, or requires a higher degree of security and separation from the host, those get their own VM.
Lock Down the Web UI
The Proxmox web interface runs on port 8006 and is accessible to anyone who can reach it. By default that's more people than it should be. At minimum: isolate it on a dedicated management interface / VLAN, disable root login over SSH, and use SSH keys only. If your VMs are able to hit the Proxmox login page, you've already made a mistake. I went one step further and set up host-based access control (HBAC), only allowing my desktop PC access.
# /etc/default/pveproxy
ALLOW_FROM="10.x.x.200"
DENY_FROM="all"
POLICY="allow"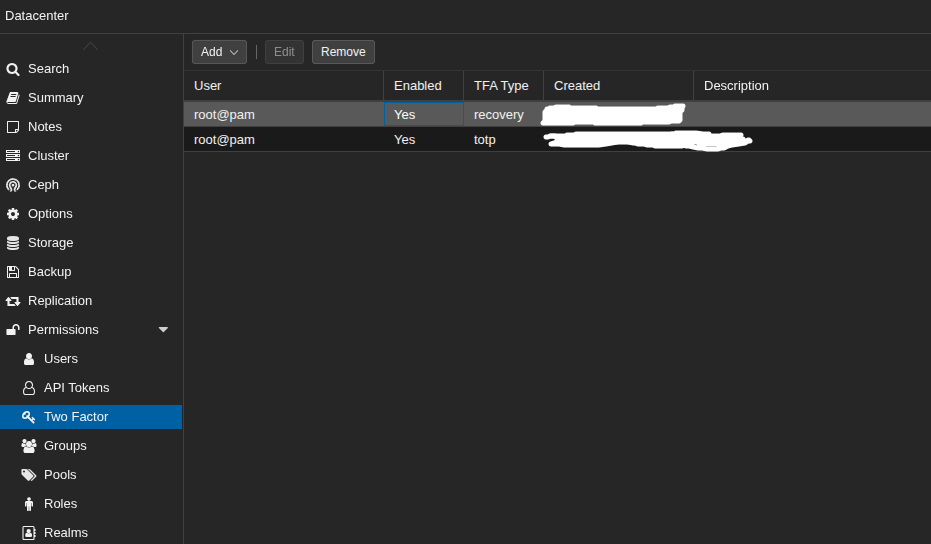
Network Security
Isolated VM-only Network
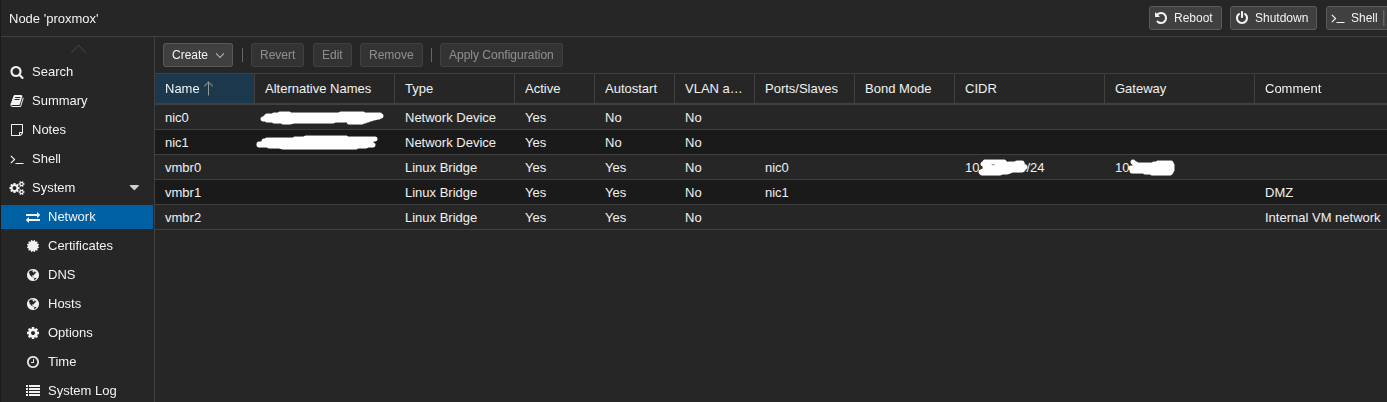
Another thing I do beyond VLAN segmentation, is I also run a dedicated internal-only Linux bridge with no physical interface attached. Certain VMs and LXC containers are connected to this bridge to allow direct communication without ever touching the physical network. Traffic between them stays on the host, which not only tightens the security boundary (internal services that have no business being reachable from the broader network aren't) but also improves latency since packets never leave the hypervisor. For tightly coupled services that talk to each other frequently, it makes a noticeable difference.
Caddy Ties It All Together
All of this comes together with Caddy running in its own LXC container, sitting on both the internal bridge and the main network bridge. Services that have no reason to be publicly reachable stay on the internal bridge. Host-based firewall rules on each VM / LXC ensure Caddy is the only thing that talks to them. It handles TLS termination, proxies requests to the right container, and nothing else in the stack needs an exposed port. One container as the single point of ingress, everything else locked away behind it.
The other VMs and containers sit on the main bridge, but the same principle applies; each host locks down what it accepts and from where, so even if something on the same bridge were compromised, lateral movement is limited by what each host will actually talk to. Defence in depth at every layer.
DMZ
For services that need some degree of public accessibility, I have a dedicated physical interface on the Proxmox host configured as a DMZ. Anything sitting on it is treated as hostile by default; strict firewall rules prevent it from reaching anything on the internal network under any circumstances. If something in the DMZ were ever compromised, there's no path inward. Public-facing services in the DMZ connect back to my VPS via a WireGuard tunnel, acting as a site-to-site VPN. This keeps my home IP off the internet entirely while adding another layer of separation between the public endpoint and my internal infrastructure.
Keep the Host Clean
The Proxmox host is a hypervisor, treat it like one. Don't install unnecessary software on it, don't run services directly on it, and don't use it as a general-purpose machine. Every package you add is an attack surface you don't need. If you want to run something, spin up a container for it. The whole point of a hypervisor is that it runs other things; not the other way around.
Wrapping Up
Proxmox is one of those tools that gets out of your way when you configure it right and makes your life miserable when you don't. None of this is complicated, it's mostly just sensible defaults and a bit of discipline. Get the storage right, get the network right, keep the host clean, and the rest takes care of itself. In a future post I'll cover my Proxmox Backup Server setup once it's actually live, because a homelab without backups is just a disaster waiting to happen.